Vaadin Fusion Basics Tutorial
- Required Tools
- Download a New Vaadin Fusion Project
- Importing a Vaadin Fusion Project
- Defining the Data Model and Service Layer
- Create a Typed Server Endpoint
- An Introduction to Building Reactive UIs
- Lit Basics
- Building the Todo View Component
- Optional: Deploy the Application to Heroku
- Next Steps and Helpful Links
This tutorial teaches you the core concepts of Vaadin Fusion while you build a full-stack application for managing to-do items. After completing the tutorial, you are ready to start experimenting on your own or continue to more advanced tutorials.
Required Tools
You need the following tools and libraries to complete the tutorial:
Java 11 or later and Maven.
Visual Studio Code is used in this tutorial. See the setup instructions on YouTube.
You can use any IDE that supports Java and TypeScript development.
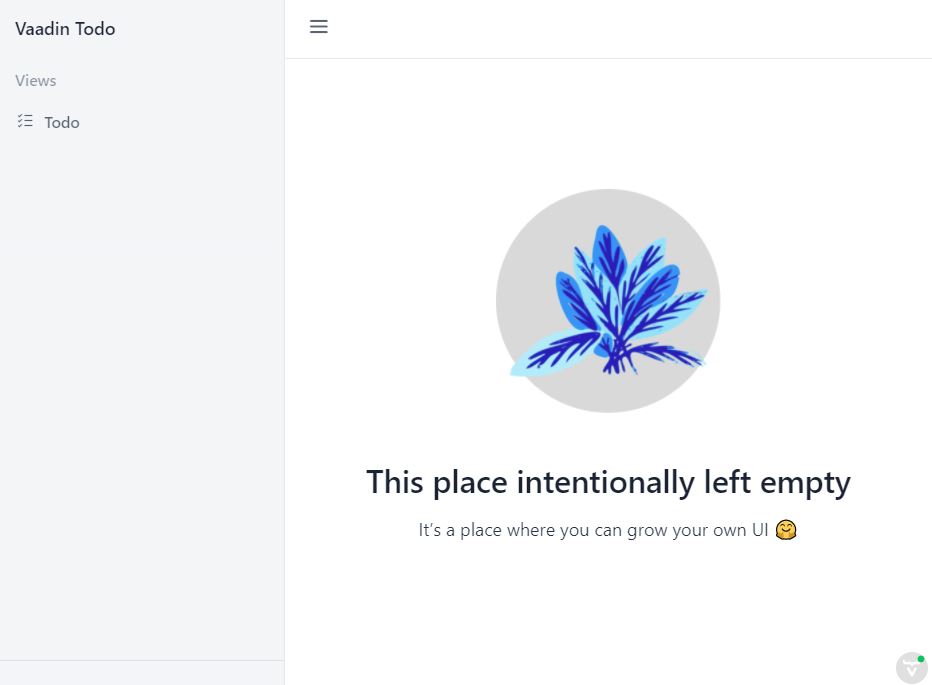
Download a New Vaadin Fusion Project
The pre-configured starter project includes:
An empty
TodoviewH2 database and Spring Data JPA dependencies
Importing a Vaadin Fusion Project
Unzip the downloaded file and open the project in your IDE. The instructions in this tutorial assume you use VS Code.
Open the project by either:
Navigating to the project folder and running
code .(note the period).Choosing File > Open… in VS Code and selecting the project folder.
Installing the following plugins in VS Code is recommended for an optimal development experience:
VS Code should automatically suggest these for you when you open the project.
Project Structure and Architecture
Vaadin Fusion projects are based on Spring Boot and use Maven for project management.
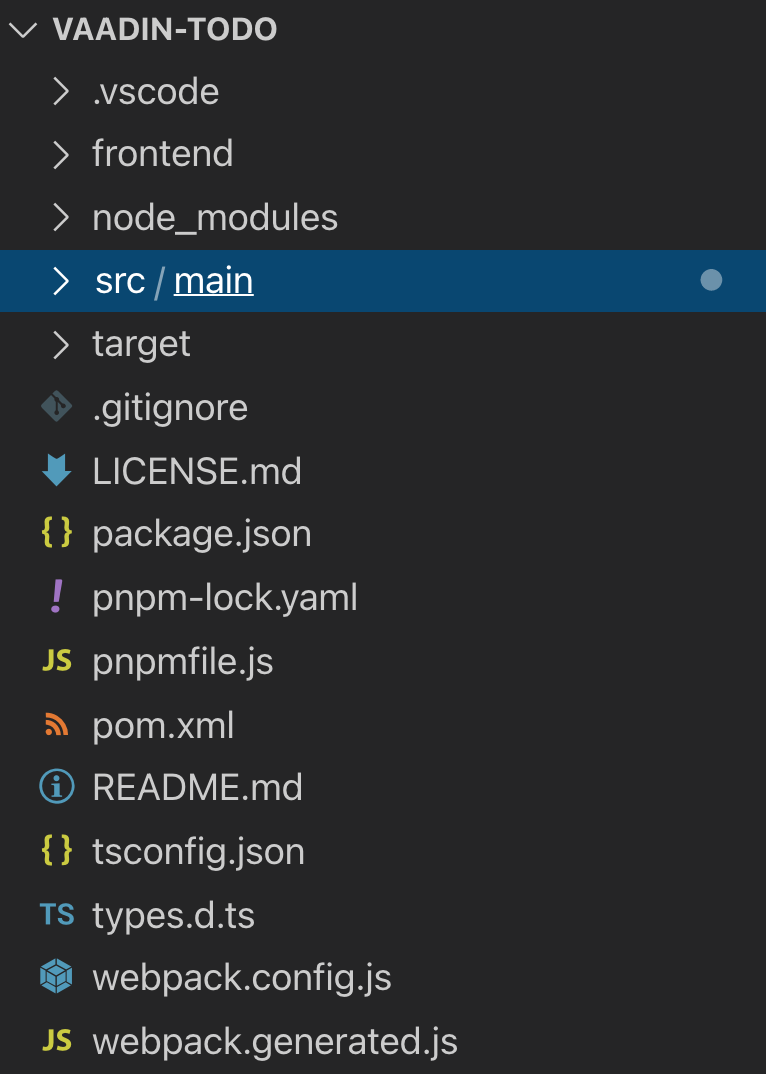
The two important folders to know are:
frontendThis is where your views and frontend code live.
srcThis is where your Java backend code lives.
The key files in a Vaadin Fusion application are:
pom.xmlThe project configuration file which defines dependencies.
frontend/index.htmlThe bootstrap page (you usually do not need to change this).
frontend/index.tsDefines routing.
src/main/java/com/example/application/Application.javaRuns the Spring Boot application.
Defining the Data Model and Service Layer
Begin by setting up the data model and services for accessing the database.
You can do it in two steps:
Define an entity.
Create a repository for accessing the database.
This tutorial shows how to use an in-memory H2 database and JPA for persistence.
The starter you download already includes the needed dependencies in pom.xml.
Define a JPA entity class for the data model, by creating a new Todo.java file in src/main/java/com/example/application/data/entity with the following content:
package com.example.application.data.entity;

import javax.persistence.Entity;
import javax.validation.constraints.NotBlank;

import com.example.application.data.AbstractEntity;

@Entity 1
public class Todo extends AbstractEntity { 2

 private boolean done = false;
 @NotBlank 3
 private String task;

 public Todo() {
 }

 public Todo(String task) {
   this.task = task;
 }

 public boolean isDone() {
   return done;
 }

 public void setDone(boolean done) {
   this.done = done;
 }

 public String getTask() {
   return task;
 }

 public void setTask(String task) {
   this.task = task;
 }
}
Turn the class into a JPA entity with an
@Entityannotation.Extend from
AbstractEntityto get id generation, equals and hashCode.Add a
@NotBlankJava bean validation annotation to enforce validity both in the view and on the server.
Next, create a repository for accessing the database. You only need to provide an interface with type information, Spring Data takes care of the implementation.
Create a new file, TodoRepository.java, in src/main/java/com/example/application/data/service with the following contents:
package com.example.application.data.service;

import com.example.application.data.entity.Todo;

import org.springframework.data.jpa.repository.JpaRepository;

public interface TodoRepository extends JpaRepository<Todo, Integer> {

}
You now have all the necessary backend code in place to start building a UI.
Run the project from the command line with the following command:
mvnThe first time you run mvn, it may take up to a few minutes as it downloads all dependencies and builds a frontend bundle.
On the following builds mvn does not download dependencies and builds are much faster.
When the build has finished, you should see the application running on http://localhost:8080.
Create a Typed Server Endpoint
One of the key features of Vaadin Fusion is type-safe server access through endpoints.
When you define an @Endpoint, Vaadin creates the needed REST-like endpoints, secures them, and generates TypeScript interfaces for all the used data types and public methods.
Having full-stack type safety helps you stay productive through autocomplete and helps guard against accidental UI breakage when the data model changes on the server.
Create a new TodoEndpoint.java file in src/main/java/com/example/application/data/endpoint:
package com.example.application.data.endpoint;

import java.util.List;

import com.example.application.data.entity.Todo;
import com.example.application.data.service.TodoRepository;
import com.vaadin.flow.server.auth.AnonymousAllowed;
import com.vaadin.fusion.Endpoint;
import com.vaadin.fusion.Nonnull;

@Endpoint 1
@AnonymousAllowed 2
public class TodoEndpoint {
 private TodoRepository repository;

 public TodoEndpoint(TodoRepository repository) { 3
   this.repository = repository;
 }

 public @Nonnull List<@Nonnull Todo> findAll() { 4
   return repository.findAll();
 }

 public Todo save(Todo todo) {
   return repository.save(todo);
 }
}
Annotating a class with
@Endpointexposes it as a service for client-side views. All public methods of an endpoint are callable from TypeScript.By default, endpoint access requires an authenticated user.
@AnonymousAllowedenables access for anyone. See Configuring Security for more information on endpoint security.Use Spring to automatically inject the
TodoRepositorydependency for database access.Using the
@Nonnullannotation ensures that the TypeScript Generator does not interpret these values as possiblyundefined.
Save the file and ensure the change is loaded.
You should see log output from the reload (that ends with a Frontend compiled successfully message) in the console.
If you did not have the server running, or if something failed, (re)start the server with the mvn command.
An Introduction to Building Reactive UIs
Building reactive views and components may take some getting used to, if your background is in Vaadin Flow, jQuery, or another imperative model. Reactive views have fewer moving parts and because of this they are easier to understand and debug. In reactive UI programming, your UI is a function of the component’s state. Whenever the state changes, the UI is re-rendered.
In imperative UI programming, there are two states: the data model and the UI. It is your responsibility as a developer to keep them in sync. In reactive programming, there is only one state: the data. The UI always reflects that state.
public class ImperativeView extends Div {
 H1 header = new H1();
 ListItem email = new ListItem();
 ListItem phone = new ListItem();

 public ImperativeView() {
   add(header, new UnorderedList(email, phone));
 }

 // Update UI when contact changes
 public void setContact(Contact contact) {
   header.setText(String.format("Details for %s %s",
     contact.getFirstName(),
     contact.getLastName()));
   email.setText("Email: " + contact.getEmail());
   phone.setText("Phone: " + contact.getPhone());
 }
}
When building a UI imperatively, you need to keep references to elements so you can update their values when the underlying state (the Contact) changes.
export class ReactiveView extends View {
 @property({ type: Object })
 contact: Contact = {...};

 // Render is called automatically when contact changes
 render() {
   return html`
     <h1>Details for ${this.contact.firstName} ${this.contact.lastName}</h1>
     <ul>
       <li>Email: ${this.contact.email}</li>
       <li>Phone: ${this.contact.phone}</li>
     </ul>
   `;
 }
}
When building a UI reactively, you define a template using values from the state (Contact).
Whenever the model changes, the template is automatically updated.
Tip | Avoid element references in reactive views As a rule of thumb, you should not use |
Lit Basics
Vaadin Fusion uses the Lit library for client-side views. It is a lightweight and highly performant library for building reactive components with declarative templates.
You can learn the basics of Lit in the Lit basics article.
Building the Todo View Component
Now that you know the basics of reactive UI programming and Lit, you are ready for the final part of the tutorial: creating a view for adding and viewing todo items.
Open frontend/views/todo/todo-view.ts and replace its contents with the following:
import {
  1
  css,
  html,
  LitElement
} from 'lit';

import { customElement, state } from 'lit/decorators.js';

import '@vaadin/vaadin-text-field';
import '@vaadin/vaadin-button';
import '@vaadin/vaadin-checkbox';
import { Binder, field } from '@vaadin/form';
import * as TodoEndpoint from 'Frontend/generated/TodoEndpoint';
import Todo from 'Frontend/generated/com/example/application/data/entity/Todo';
import TodoModel from 'Frontend/generated/com/example/application/data/entity/TodoModel';

@customElement('todo-view') 2
export class TodoView extends LitElement { 3
}
Import the UI components, helpers, and generated TypeScript models required for building the view.
Register the new component with the browser. This makes it available as
<todo-view>. The routing inindex.tsis already set up to show it when you navigate to the application.Define the component class that extends from
LitElement.
Defining the View State
Inside the TodoView class, define the view state as follows:
 @state()
 private todos: Todo[] = []; 1
 private binder = new Binder(this, TodoModel); 2
The list of
Todoitems is private and decorated with@state()so Lit observes it for changes.A Vaadin
Binderis used to handle the form state for creating new Todos.TodoModelis automatically generated by Vaadin. It describes the data types and validations thatBinderneeds. Read more about forms in Creating Client-Side Forms.
Defining CSS
 static styles = css`
   :host {
     display: block;
     padding: var(--lumo-space-m) var(--lumo-space-l); 1
   }
 `;
The
paddingproperty is defined using the spacing properties to be consistent with the rest of the app.
Defining the HTML Template
Start by defining a render() method that returns a html template literal.
render() {
 return html`

 `;
}
Add the following code within the html template:
return html`
   <div class='form'>
    <vaadin-text-field
      ...='${field(this.binder.model.task)}'
    ></vaadin-text-field> 1
    <vaadin-button
      theme='primary'
      @click=${this.createTodo 2}
      ?disabled=${this.binder.invalid 3}
      >Add</vaadin-button>
   </div>
`;
The Text Field component is bound to the
taskproperty of aTodousing…='${field(this.binder.model.task)}'. The…='${}'is the spread operator, which applies several properties at once. You can read more about forms in Creating Client-Side Forms.The click event of the Add button is bound to the
createTodo()method.The button is disabled if the form is invalid.
Right underneath the previous <div>, add the following code:
return html`
   <div class='todos'>
    ${this.todos.map((todo) => html` 1
        <div class='todo'>
          <vaadin-checkbox
            ?checked=${todo.done 2}
            @checked-changed=${(e: CustomEvent) => 3
              this.updateTodoState(todo, e.detail.value)}
          ></vaadin-checkbox>
          <span>${todo.task}</span>
        </div>
      `)}
   </div>
`;
The existing todo items are shown by mapping the
todosarray to Lit templates. The template for a singleTodocontains a checkbox and the task text.Bind the
checkedboolean attribute to thedoneproperty on the todo.Call the
updateTodoState()method, with the todo and the new value whenever the checked value changes.
Updating the View State and Calling the Backend
Below the render() method in the TodoView class, add a connectedCallback() lifecycle callback to initialize the view when it is attached to the DOM.
async connectedCallback() { 1
 super.connectedCallback(); 2
 this.todos = await TodoEndpoint.findAll(); 3
}
Use an async function to make it easier to handle asynchronous code.
Remember to call the superclass method.
The
getTodos()method is automatically generated by Vaadin based on the method inTodosEndpoint.java. The method was imported in the head of the file. Theawaitkeyword waits for the server response without blocking the UI.
Below the connectedCallback(), add another method to handle the creation of new `Todo`s.
async createTodo() {
 const createdTodo = await this.binder.submitTo(TodoEndpoint.save); 1
 if (createdTodo) { 2
   this.todos = [...this.todos, createdTodo];
   this.binder.clear();
 }
}
Use binder to submit the form to
TodoEndpoint. The binder validates the input before posting it and the server re-validates it.If the
Todowas saved successfully, update thetodosarray and clear the form.
Finally, add a method for updating the todo state right below createTodo():
updateTodoState(todo: Todo, done: boolean) {
 const updatedTodo = { ...todo, done }; 1
 this.todos = this.todos.map((t) => (t.id === todo.id ? updatedTodo : t)); 2
 TodoEndpoint.save(updatedTodo); 3
}
Create a new
Todowith the updateddonestate.Update the local
todosarray with the new state. Themapoperator creates a new array where the changedtodois swapped out.Save the updated todo to the server.
Complete View Code
The completed view code is as follows:
import {
css,
html,
LitElement
} from 'lit';
import { customElement, state } from 'lit/decorators.js';
import '@vaadin/vaadin-text-field';
import '@vaadin/vaadin-button';
import '@vaadin/vaadin-checkbox';
import { Binder, field } from '@vaadin/form';
import * as TodoEndpoint from 'Frontend/generated/TodoEndpoint';
import Todo from 'Frontend/generated/com/example/application/data/entity/Todo';
import TodoModel from 'Frontend/generated/com/example/application/data/entity/TodoModel';
@customElement('todo-view')
export class TodoView extends LitElement {
@state()
private todos: Todo[] = [];
private binder = new Binder(this, TodoModel);
static styles = css`
:host {
display: block;
padding: var(--lumo-space-m) var(--lumo-space-l);
}
`;
render() {
return html`
<div class='form'>
<vaadin-text-field
...='${field(this.binder.model.task)}'
></vaadin-text-field>
<vaadin-button
theme='primary'
@click='${this.createTodo}'
?disabled='${this.binder.invalid}'
>Add</vaadin-button
>
</div>
<div class='todos'>
${this.todos.map(
(todo) => html`
<div class='todo'>
<vaadin-checkbox
?checked='${todo.done}'
@checked-changed='${(
e: CustomEvent
) => this.updateTodoState(todo, e.detail.value)}'
></vaadin-checkbox>
<span>${todo.task}</span>
</div>
`
)}
</div>
`;
}
async connectedCallback() {
//(1)
super.connectedCallback();
this.todos = await TodoEndpoint.findAll();
}
async createTodo() {
const createdTodo = await this.binder.submitTo(TodoEndpoint.save);
if (createdTodo) {
this.todos = [...this.todos, createdTodo];
this.binder.clear();
}
}
updateTodoState(todo: Todo, done: boolean) {
const updatedTodo = { ...todo, done };
this.todos = this.todos.map((t) => (t.id === todo.id ? updatedTodo : t));
TodoEndpoint.save(updatedTodo);
}
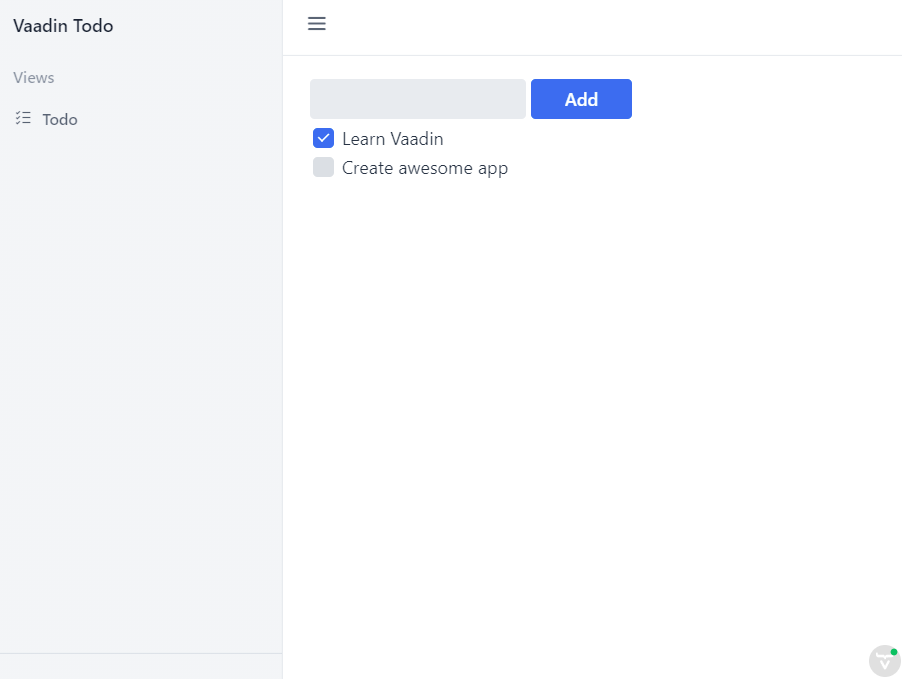
}Run the Completed Application
Start your server with the mvn command if you do not already have it running.
Open http://localhost:8080 in your browser and you should now have a fully functional todo application. Notice that you can refresh the browser and it keeps the same todo items as they are persisted in the database.
Optional: Deploy the Application to Heroku
The following steps are optional. You can follow them to deploy your application to Heroku, a cloud deployment platform that offers a free tier that does not require a credit card.
Preparing the Application for Production
It’s important to build a separate production-optimized version of the application before deploying it. In development mode, Vaadin has a live-reload widget, debug logging, and uses a quick, but unoptimized, frontend build that includes source maps for easy debugging. Unoptimized frontend bundles can contain several megabytes of JavaScript.
The pom.xml build includes a production profile configuration that prepares an optimized build that’s ready for production.
Using a PostgreSQL Database in Production
During development, the application has used an in-memory H2 database. It is convenient and works well for a single user. In production, you want to use something more robust and persistent. Heroku’s free tier supports PostgreSQL, so can configure your application to use that.
First, add the PostgreSQL dependency in the production profile of pom.xml:
<profile>
 <id>production</id>
 <!-- Omitted -->
 <dependencies>
   <dependency>
     <groupId>org.postgresql</groupId>
     <artifactId>postgresql</artifactId>
   </dependency>
 </dependencies>
</profile>
Next, configure how JPA should handle schema generation.
Add the following two properties to the end of application.properties.
spring.jpa.generate-ddl=true
spring.jpa.hibernate.ddl-auto=create-drop
Creating a Heroku Account and Installing Heroku CLI
Complete the following steps to create a Heroku account and install the Heroku CLI.
Go to https://signup.heroku.com/, create a new account, and verify your email.
Go to https://devcenter.heroku.com/articles/heroku-cli and follow the instructions for installing the CLI on your operating system.
Deploying a Vaadin Application to Heroku
Use the Heroku CLI to create and deploy your application.
Log in:
heroku loginConfigure the correct Java version:
echo "java.runtime.version=11" > system.propertiesInstall the Heroku Java plugin:
heroku plugins:install javaThe project uses Java 11, whereas Heroku expects Java 8 projects by default. To ensure that Heroku would run a Java 11 environment, create a system.properties file under the project’s root directory with the following content:
java.runtime.version=11Create a new app. Replace APPNAME with a name of your choice. APPNAME is part of the URL, like https://APPNAME.herokuapp.com, so choose a name that’s unique and easy to remember.
heroku create APPNAMECreate a secret key for your application:
heroku config:set APP_SECRET=$(openssl rand -base64 32)Enable the PostgreSQL plugin for the newly created app:
heroku addons:create heroku-postgresql -a APPNAMEDeploy the production-optimized JAR file you created in the previous section.
heroku deploy:jar target/fusioncrmtutorial-1.0-SNAPSHOT.jar -a APPNAMEOpen the application in your browser.
heroku openView the application logs and see if anything goes wrong.
heroku logs --tail