Vaadin Fusion Project Setup
Make sure you have Java 11 and Maven installed before you begin.
This chapter covers:
Downloading a Vaadin app starter.
Importing a Vaadin project in VS Code.
Installing VS Code plugins for productive development.
Running a Vaadin application in development mode.
Downloading a Vaadin Application Starter
This tutorial uses a pre-configured starter from Vaadin Start. The starter application includes:
A data model consisting of
Contact,Company, andStatusJPA entities.Spring Data repositories for persisting and retrieving the entities from an embedded H2 database.
A data generator that populates the database with test data.
A single, empty view.
A Dockerfile.
Download the starter application (zip file) below:
Importing a Vaadin project in VS Code
Unzip the downloaded fusion-crm-tutorial.zip file and open the folder in VS Code.
You can open the folder by:
Navigating to the project folder and running
code .(note the period).Choosing File > Open (Folder)… in VS Code and selecting the project folder.
Installing VS Code Plugins for Productive Development
When you import the project, VS Code should show a prompt suggesting recommended plugins. Select Install.
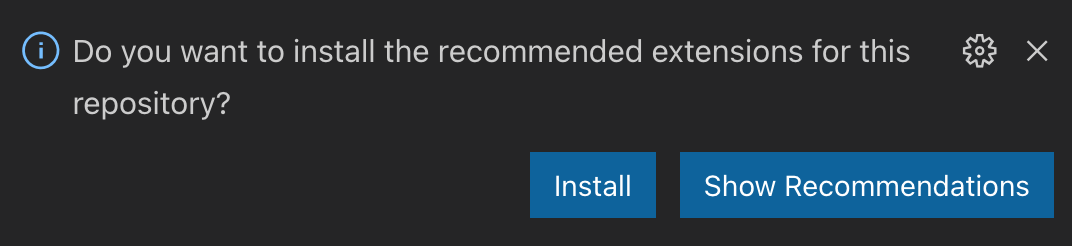
If you don’t see the prompt, install the following plugins manually through the Extensions view.
Vaadin Fusion Project Structure
Now that you have the project imported, it’s time to get familiar with the structure.
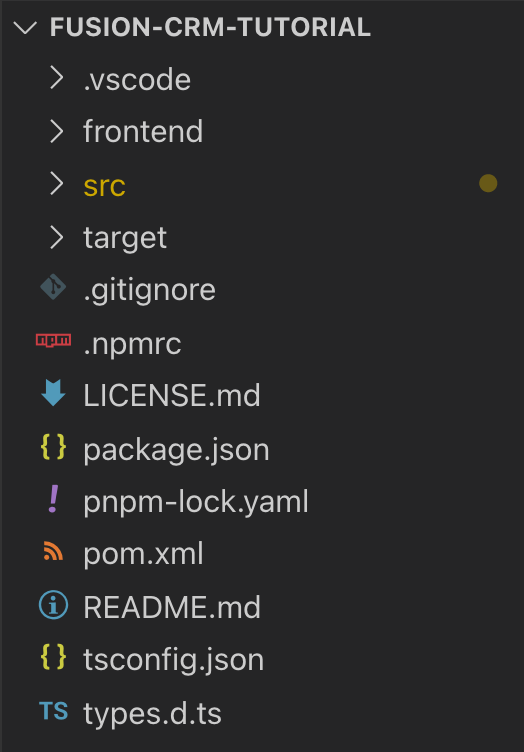
The two main folders to know are:
frontend- this is where your views and frontend code lives.src- this is where your Java backend code lives.
The key files in a Vaadin Fusion application are:
pom.xml- the project configuration file that defines backend dependencies.frontend/index.html- the bootstrap page.frontend/index.ts- the routing definition.src/main/java/com/example/application/Application.java- runs the Spring Boot application.
Running a Vaadin Application in Development Mode
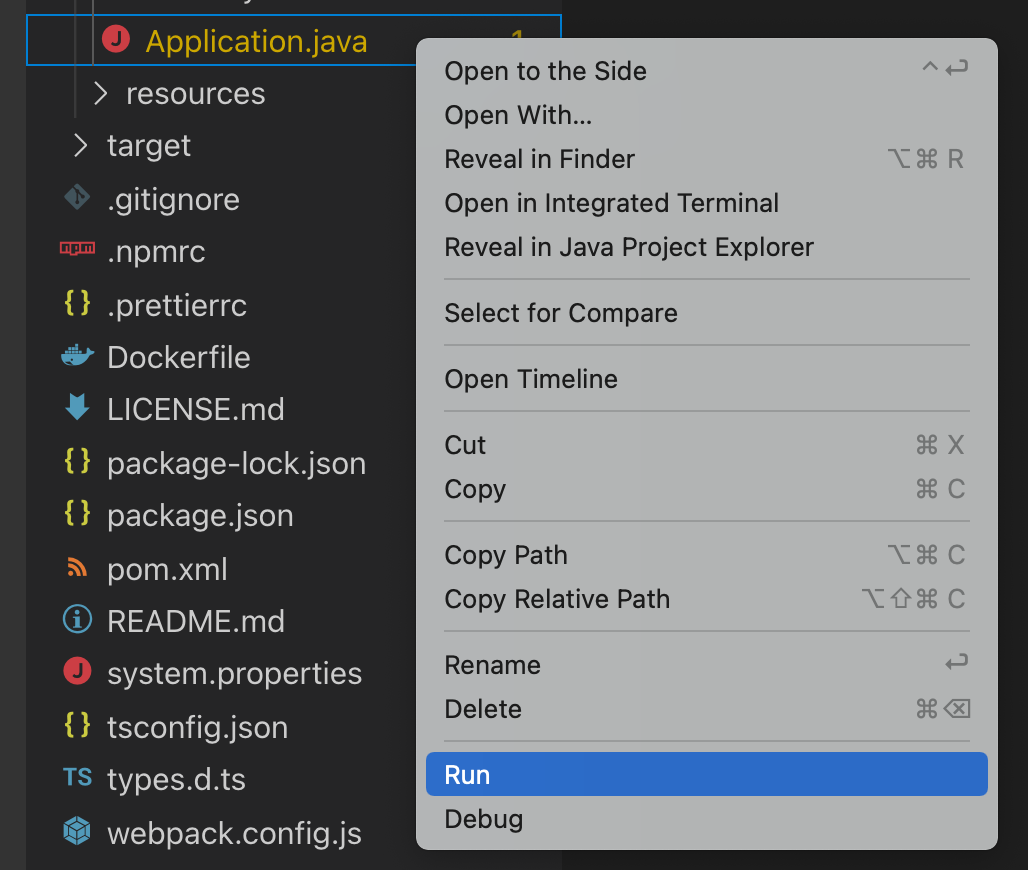
Start the application by locating Application.java within the src folder, right-click on it and select Run.
You can also select Debug, if you wish to debug the server endpoint code.
You can also run the application from the command line with the following command:
./mvnwThe first startup may take a few minutes. Vaadin downloads all needed frontend and backend dependencies and builds the application. Vaadin also installs Node and npm, if you don’t already have them installed on your computer.
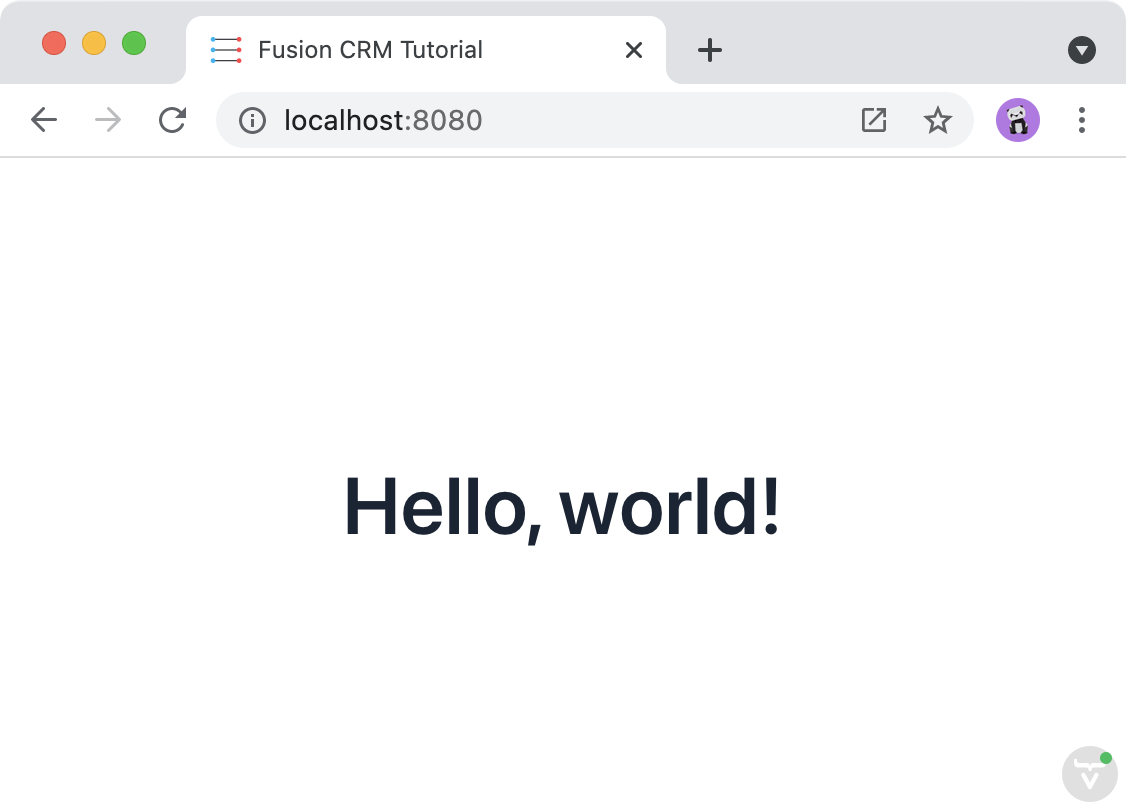
When the build finishes, Vaadin opens your default browser to http://localhost:8080.
Vaadin reloads your browser automatically when you make changes during development.
Try this out by modifying the placeholder content in the render() method in frontend/views/list/list-view.ts and saving the file.
Your browser should reflect the change within a second or two.
render() {
 return html`<h1>Hello, world!</h1>`;
}